


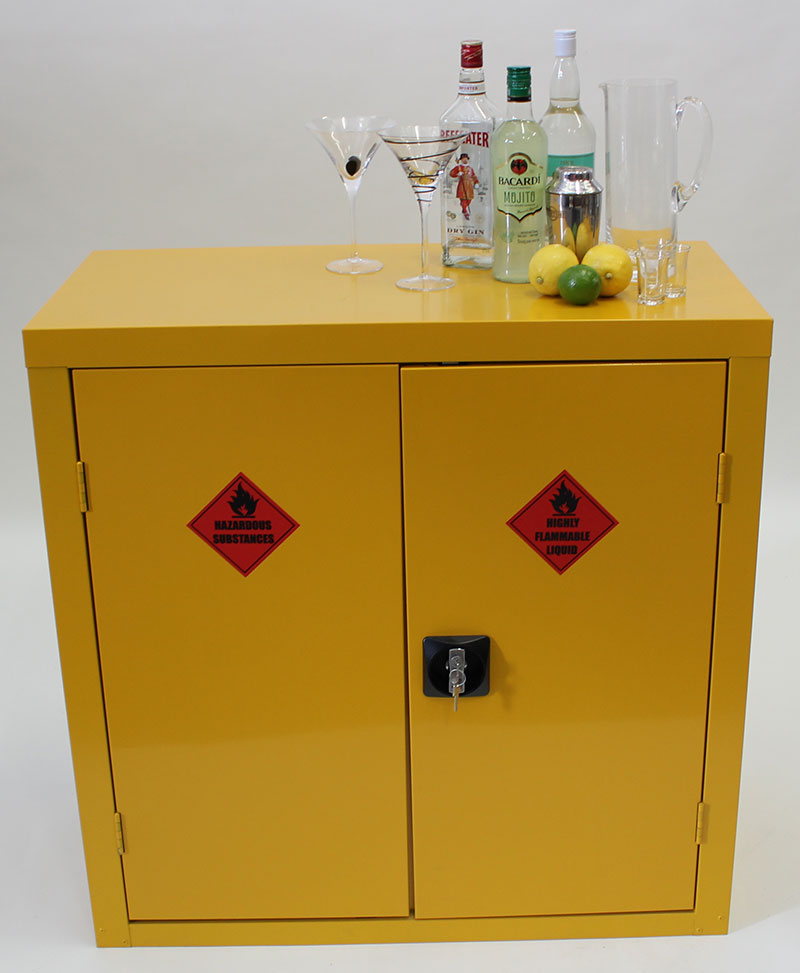
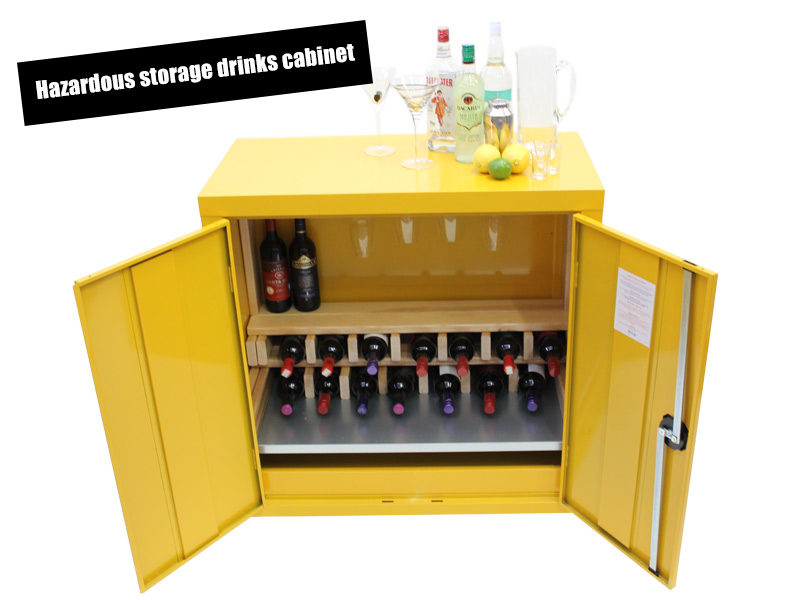
Hazardous storage drinks cabinet
Ever wondered what on earth to do when you have a hazardous storage cabinet hanging around? Nope? Neither had we! Until now...
There once was a lonely hazardous storage cabinet, all it needed was a purpose in life. So we gave it one. It became a bespoke drinks cupboard!
Be the envy of your friends when you throw a party, this cabinet is perfect for a loft apartment or funky studio, being lockable it will keep keep your alcohol out of reach of any wandering hands too!
Let's look at how we transformed our yellow cabinet into a funky drinks cupboard...
Things you'll need:
Hazardous storage cabinet - obviously!
planks of wood, we used some off-cuts from the slats of our cloakroom benches which are 73mm wide and 24mm deep but any variety of wood will do, however they do all need to be the same width and depth. (The measurements we are using are to fit the 900mm x 900mm x 450mm hazardous storage cabinet.)
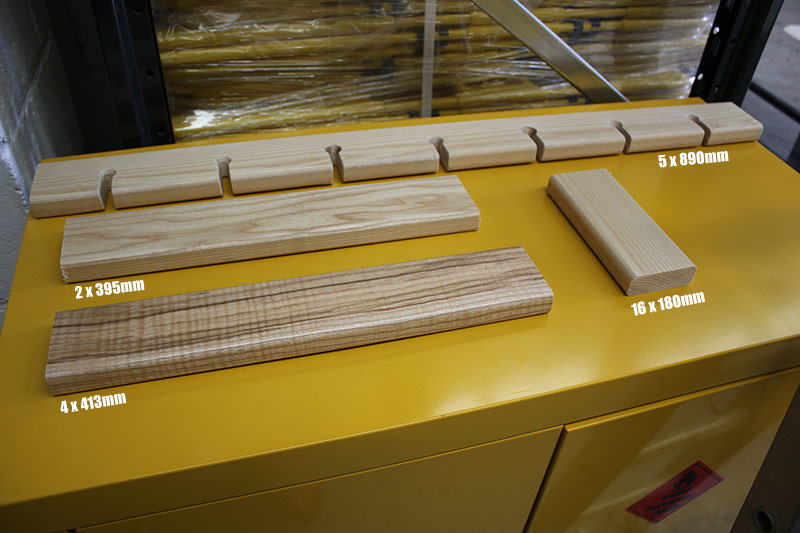
You will need to cut the wood to the following lengths:
5 at 890mm - wine glass hanging rail & 4 to create the shelves
2 at 395mm - upright glass rail supports
4 at 413mm - side shelf supports
16 at 180mm - bottle separators
Glue - 'no-more-nails' or similar, saw, ruler, tape measure, chisel, drill, 2 x drill bits - one a little bit larger than the stem of your wine glasses, and another 6mm larger than that, sandpaper, soft pencil (4B or softer, it's not groovy to make grooves in your wood).
Step one
Cut your wood to the lengths stated above. Use sandpaper to remove any rough corners and splintered edges.
Step two
Create the glass hanging rail. Select one of the 890mm pieces of wood - this will become your wine and champagne glass hanging rack. Using a tape measure, find the centre (445mm x 36.5mm) and mark using a soft pencil. We have created 7 glass hanging places, measured equally from the centre outwards to fit the width of our wine glasses (they're not small!), you can add more or less depending on the type of glasses you wish to store.
Once you have marked your desired number of glass hanging places, drill a hole at each one. Then using the saw cut a slot to match the width of your drilled hole from one side of the wood only into the hole. This will allow you to slide the glass into the rack.
Create a counter-sink to stop the glass wobbling! Select a drill bit approx 6mm larger than the one you drilled the original holes with. Carefully over-drill into the top of each hole to a depth of approximately 6mm. Use the sandpaper to remove any rough edges. (You will put the glass rack in place in step 6.)
Step three
Create the shelves. Take your edging (4 lengths of 413mm) wood. Using the glue adhere two to the right and two to the left bottom inside edges of the cabinet.
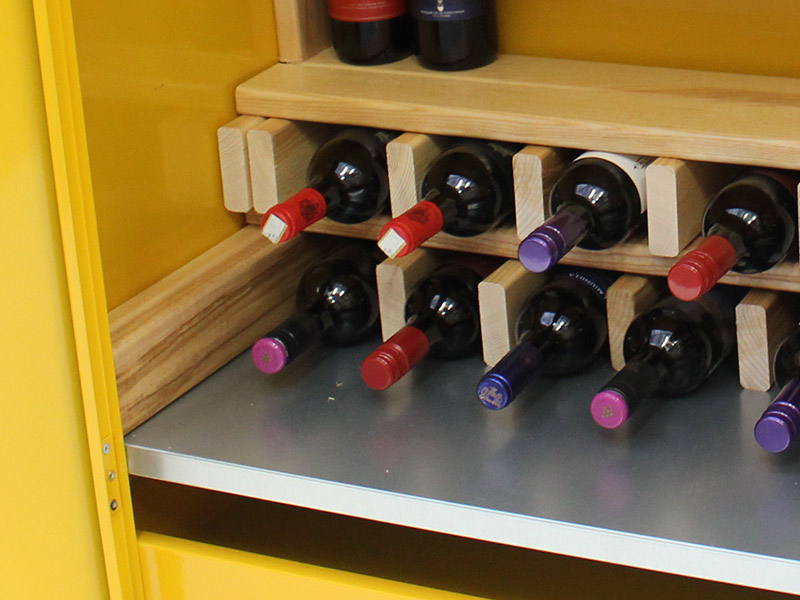
Measure and mark the placement of your wine bottle dividers. We have created 7 bottle sections on each shelf - you can create as many or few wine bottle sections to suit your requirements. We suggest the best way to decide is to lay your wine bottles in the cabinet and mark the position of your separators that way. Once you have your dividers marked, fix them into place with the glue.
Allow some time for your glue to set before moving on to the next step.
Step four
Create base of the the top shelf. Take 2 of the 890mm pieces of wood and place them on top of your bottom shelf dividers, secure in place with more marvellous no-more-nails! Again it is best to wait a short time for your glue to cure before moving on to step five.
Step five
Mark the position of your top shelf bottle dividers. Use 2 separators at each of the far edges of the top shelf. Glue the dividers into place. Once the separators are safely in position, use your final 2 lengths of 890mm wood to create the top shelf and secure with your glue.
Step six
Create the glass hanging rack supports. Take your two 395mm wood strips, and adhere vertically, one to the left and one to the right inside-edges of the cabinet, widest part of the wood to the side of cabinet as shown below.
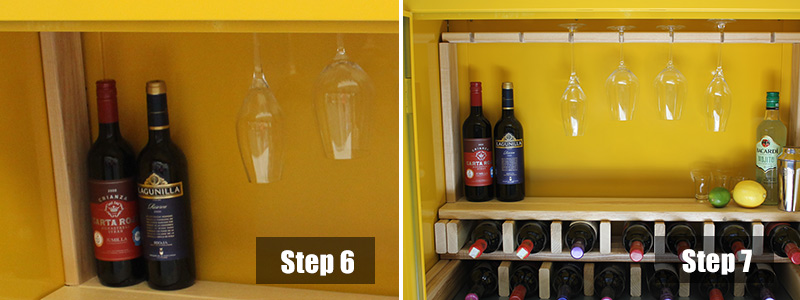
Step seven
Install your glass hanging rail. Place the glass rail you created in step two onto the two rail supports and glue to secure. Allow to dry.
Step eight
Fill your cabinet with lots of lovely grape juice, glasses and accessories such as a corkscrew, ice bucket, lemons and limes.
Step nine
Stand back and admire your creation.
Step ten
Pour yourself a large glass of wine.
Cheers!

Author Bio - Debs
Digital marketer, social media, content writer, musician, sloth-lover, tea-drinker.